April 15, 2024
Scheduling API and Webhooks: How This Works?
Leverage the power of webhooks to automate and enhance your scheduling processes with OnSched. Discover how webhooks can simplify your technology stack by automatically sending data when specific events occur, such as booking confirmations, customer updates, or appointment reminders. Learn how to set up and customize webhooks using OnSched’s API, and see how platforms like Zapier can help you integrate these webhooks into your existing workflows. Whether you're managing complex scheduling scenarios or looking to automate simple tasks, OnSched’s webhooks offer a flexible and efficient solution. Start your free trial today and explore the full potential of OnSched’s scheduling API.
Productivity
2 Min Read

In this article, we will discuss Webhooks, which are typically used by OnSched customers to simplify a technology stack or add new features. We hope you will understand how you can take advantage of OnSched’s pre-defined webhooks in your project.
What is a webhook?
Webhook is an automated message sent from an app when something happens. It’s a simple way for two applications on the internet to communicate - your app doesn’t have to ping the OnSched API for updates - new data will be sent your way automatically.
It’s essentially an automated POST request with a payload sent to a pre-defined URL. In contrast, an API request expects a response in return, whereas a webhook is set up only once and then just sends data whenever a particular event occurs.
When does OnSched send webhooks?
OnSched has a few events that trigger a webhook, which we have organized into four categories:
Booking webhook triggers
Appointment confirmed
Appointment rescheduled
Appointment canceled
Customer webhook triggers
Customer profile created
Customer profile updated
Resource Webhook triggers
Resource created
Resource updated
Reminder webhook triggers
Email reminder
SMS reminder
What data does an OnSched webhook contain?
The content of an OnSched webhook-payload will depend on the type of event that initially triggered the webhook and will include data for one or more objects that provide relevant context information for the event.
For example, a booking confirmation webhook may contain the following data points:
Customer ID;
Resource ID;
Date and time of the booking;
Location;
Customer contact information;
Resource ID, and up to 40 other parameters.
You can find a full breakdown of data sent in each webhook type in the OnSched webhook documentation.
Receiving a webhook
OnSched allows you to configure unique links for each trigger-type (appointments, customers, resources, and reminders), giving you ultimate flexibility with processing webhooks. You can use the same URL for all webhooks, provided your application can differentiate between types of triggers and process them accordingly. There are numerous ways to receive a webhook directly on your server (Node.js example), or you can use one of the platforms like Zapier.
Example
Let’s take a look at how Zapier processes OnSched webhooks.
Step 1. To catch a webhook with Zapier, you will need to create a Zap and set “webhooks by Zapier” as a trigger.
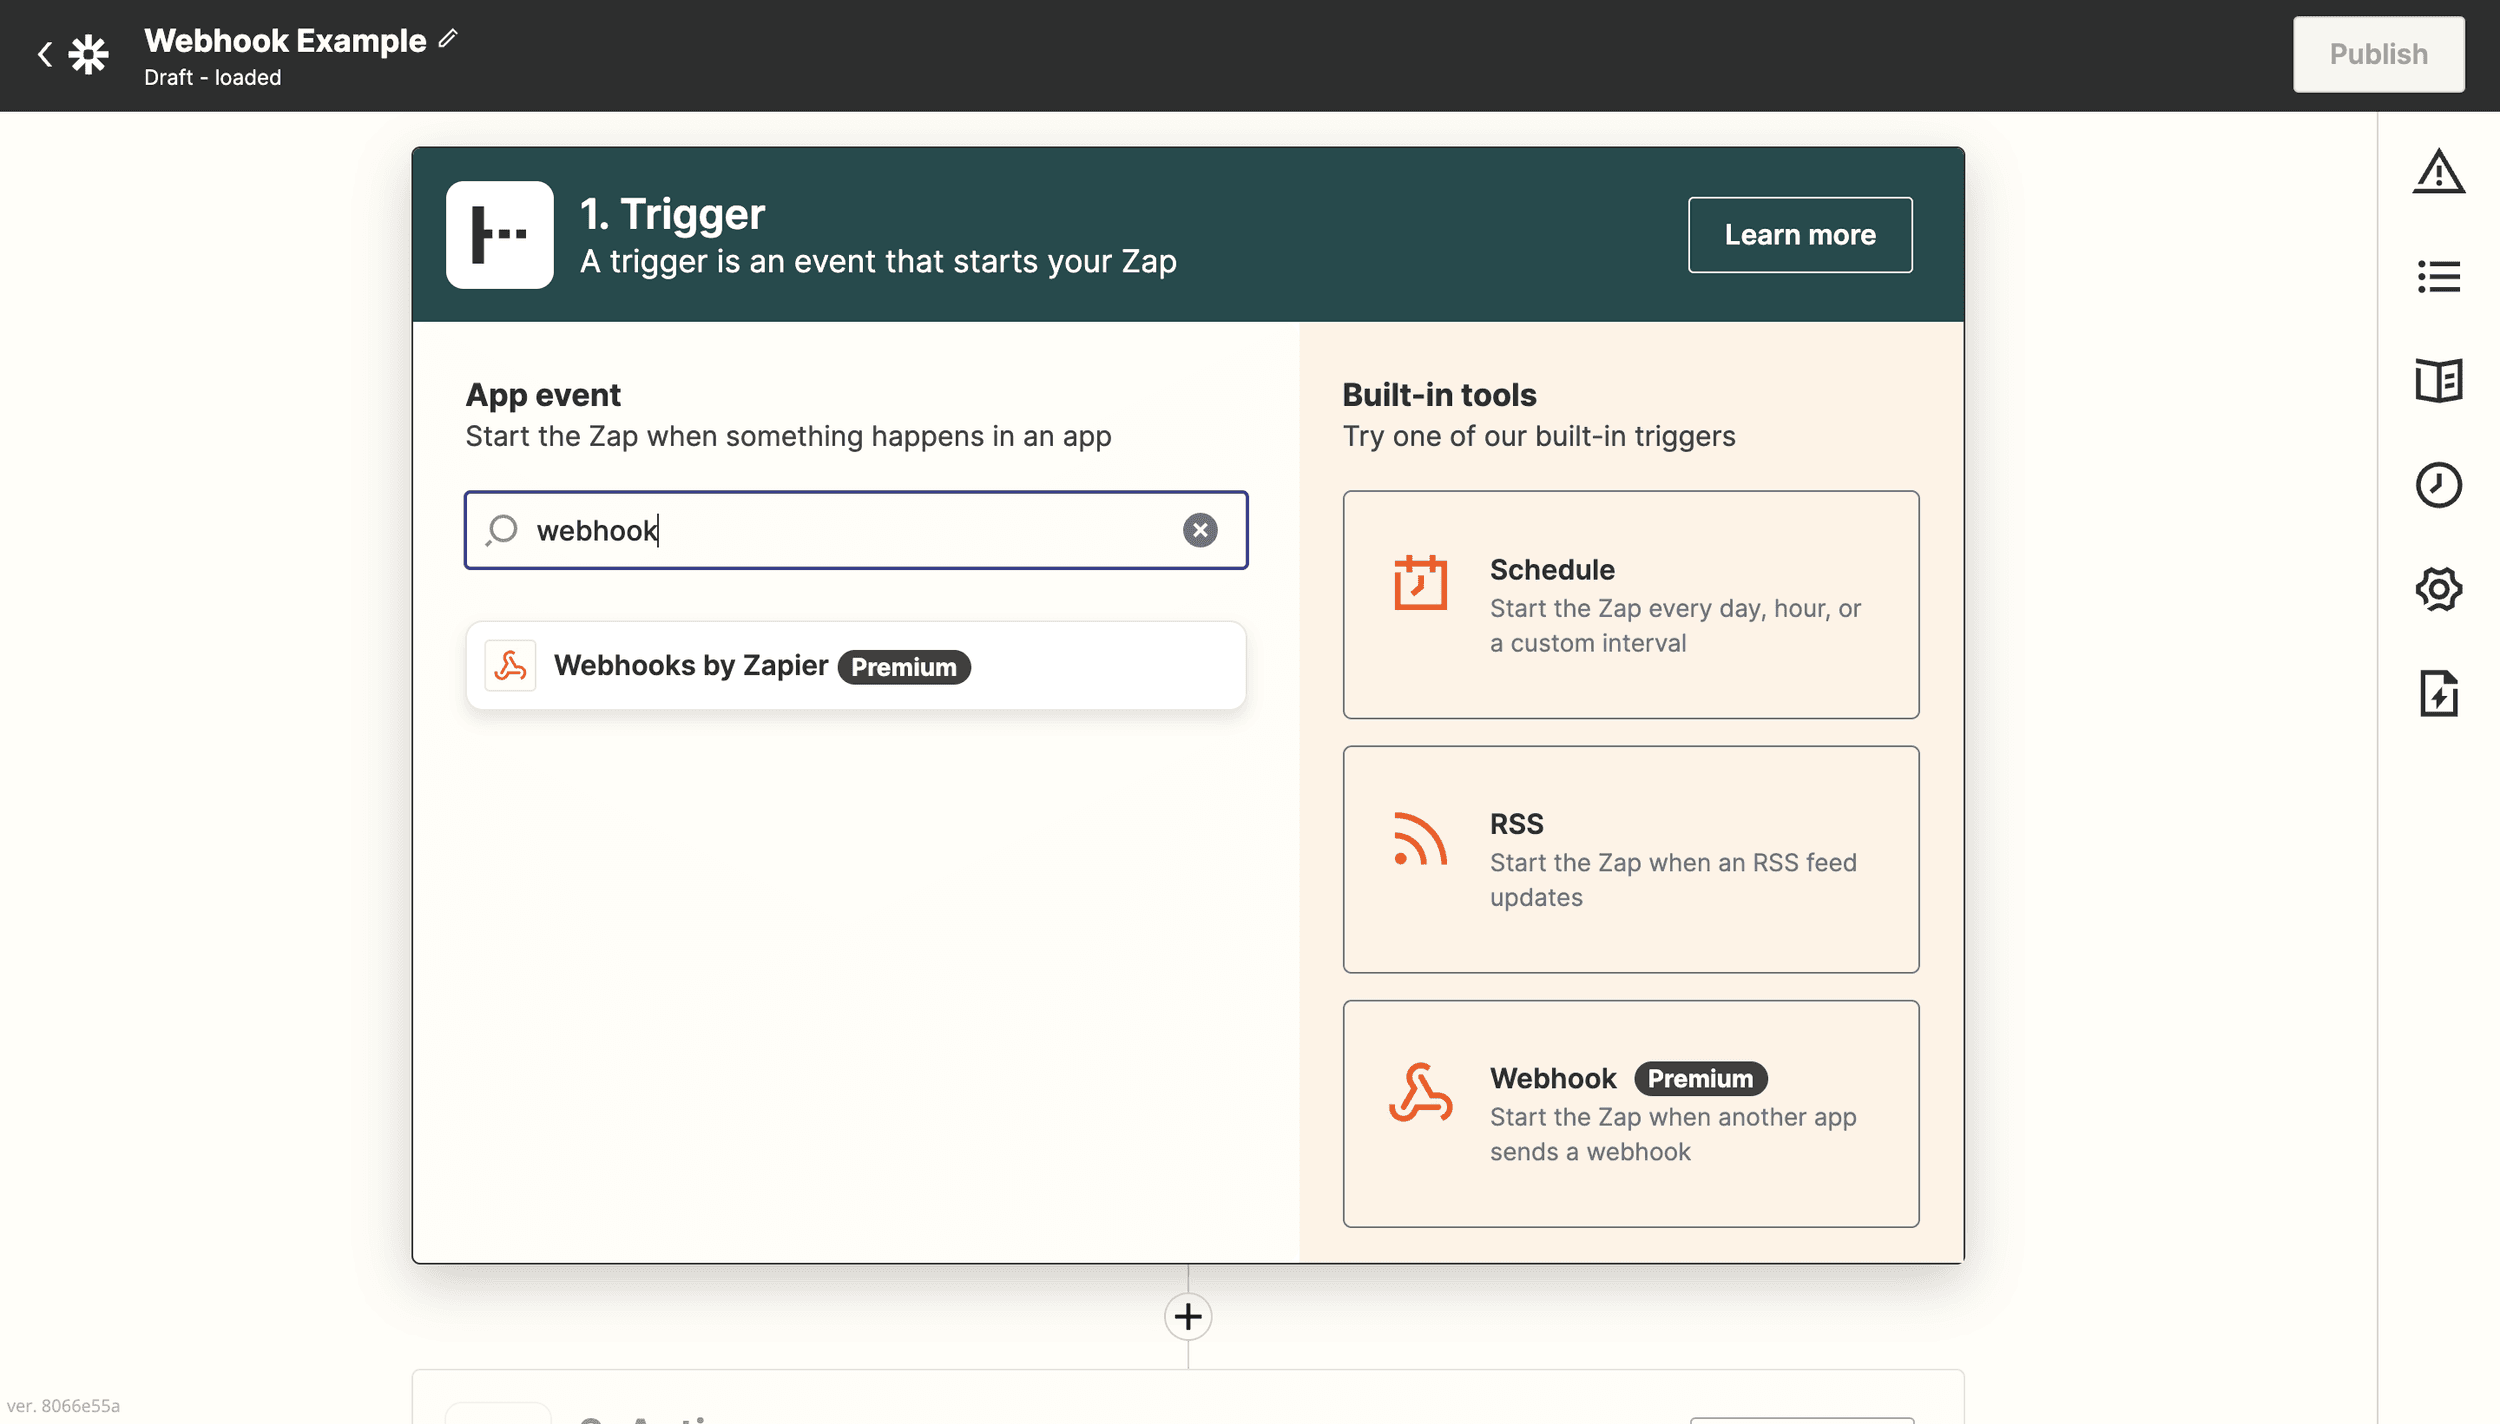
Step 2. Configure the trigger - pick “Catch Hook” as an event that starts the Zap.

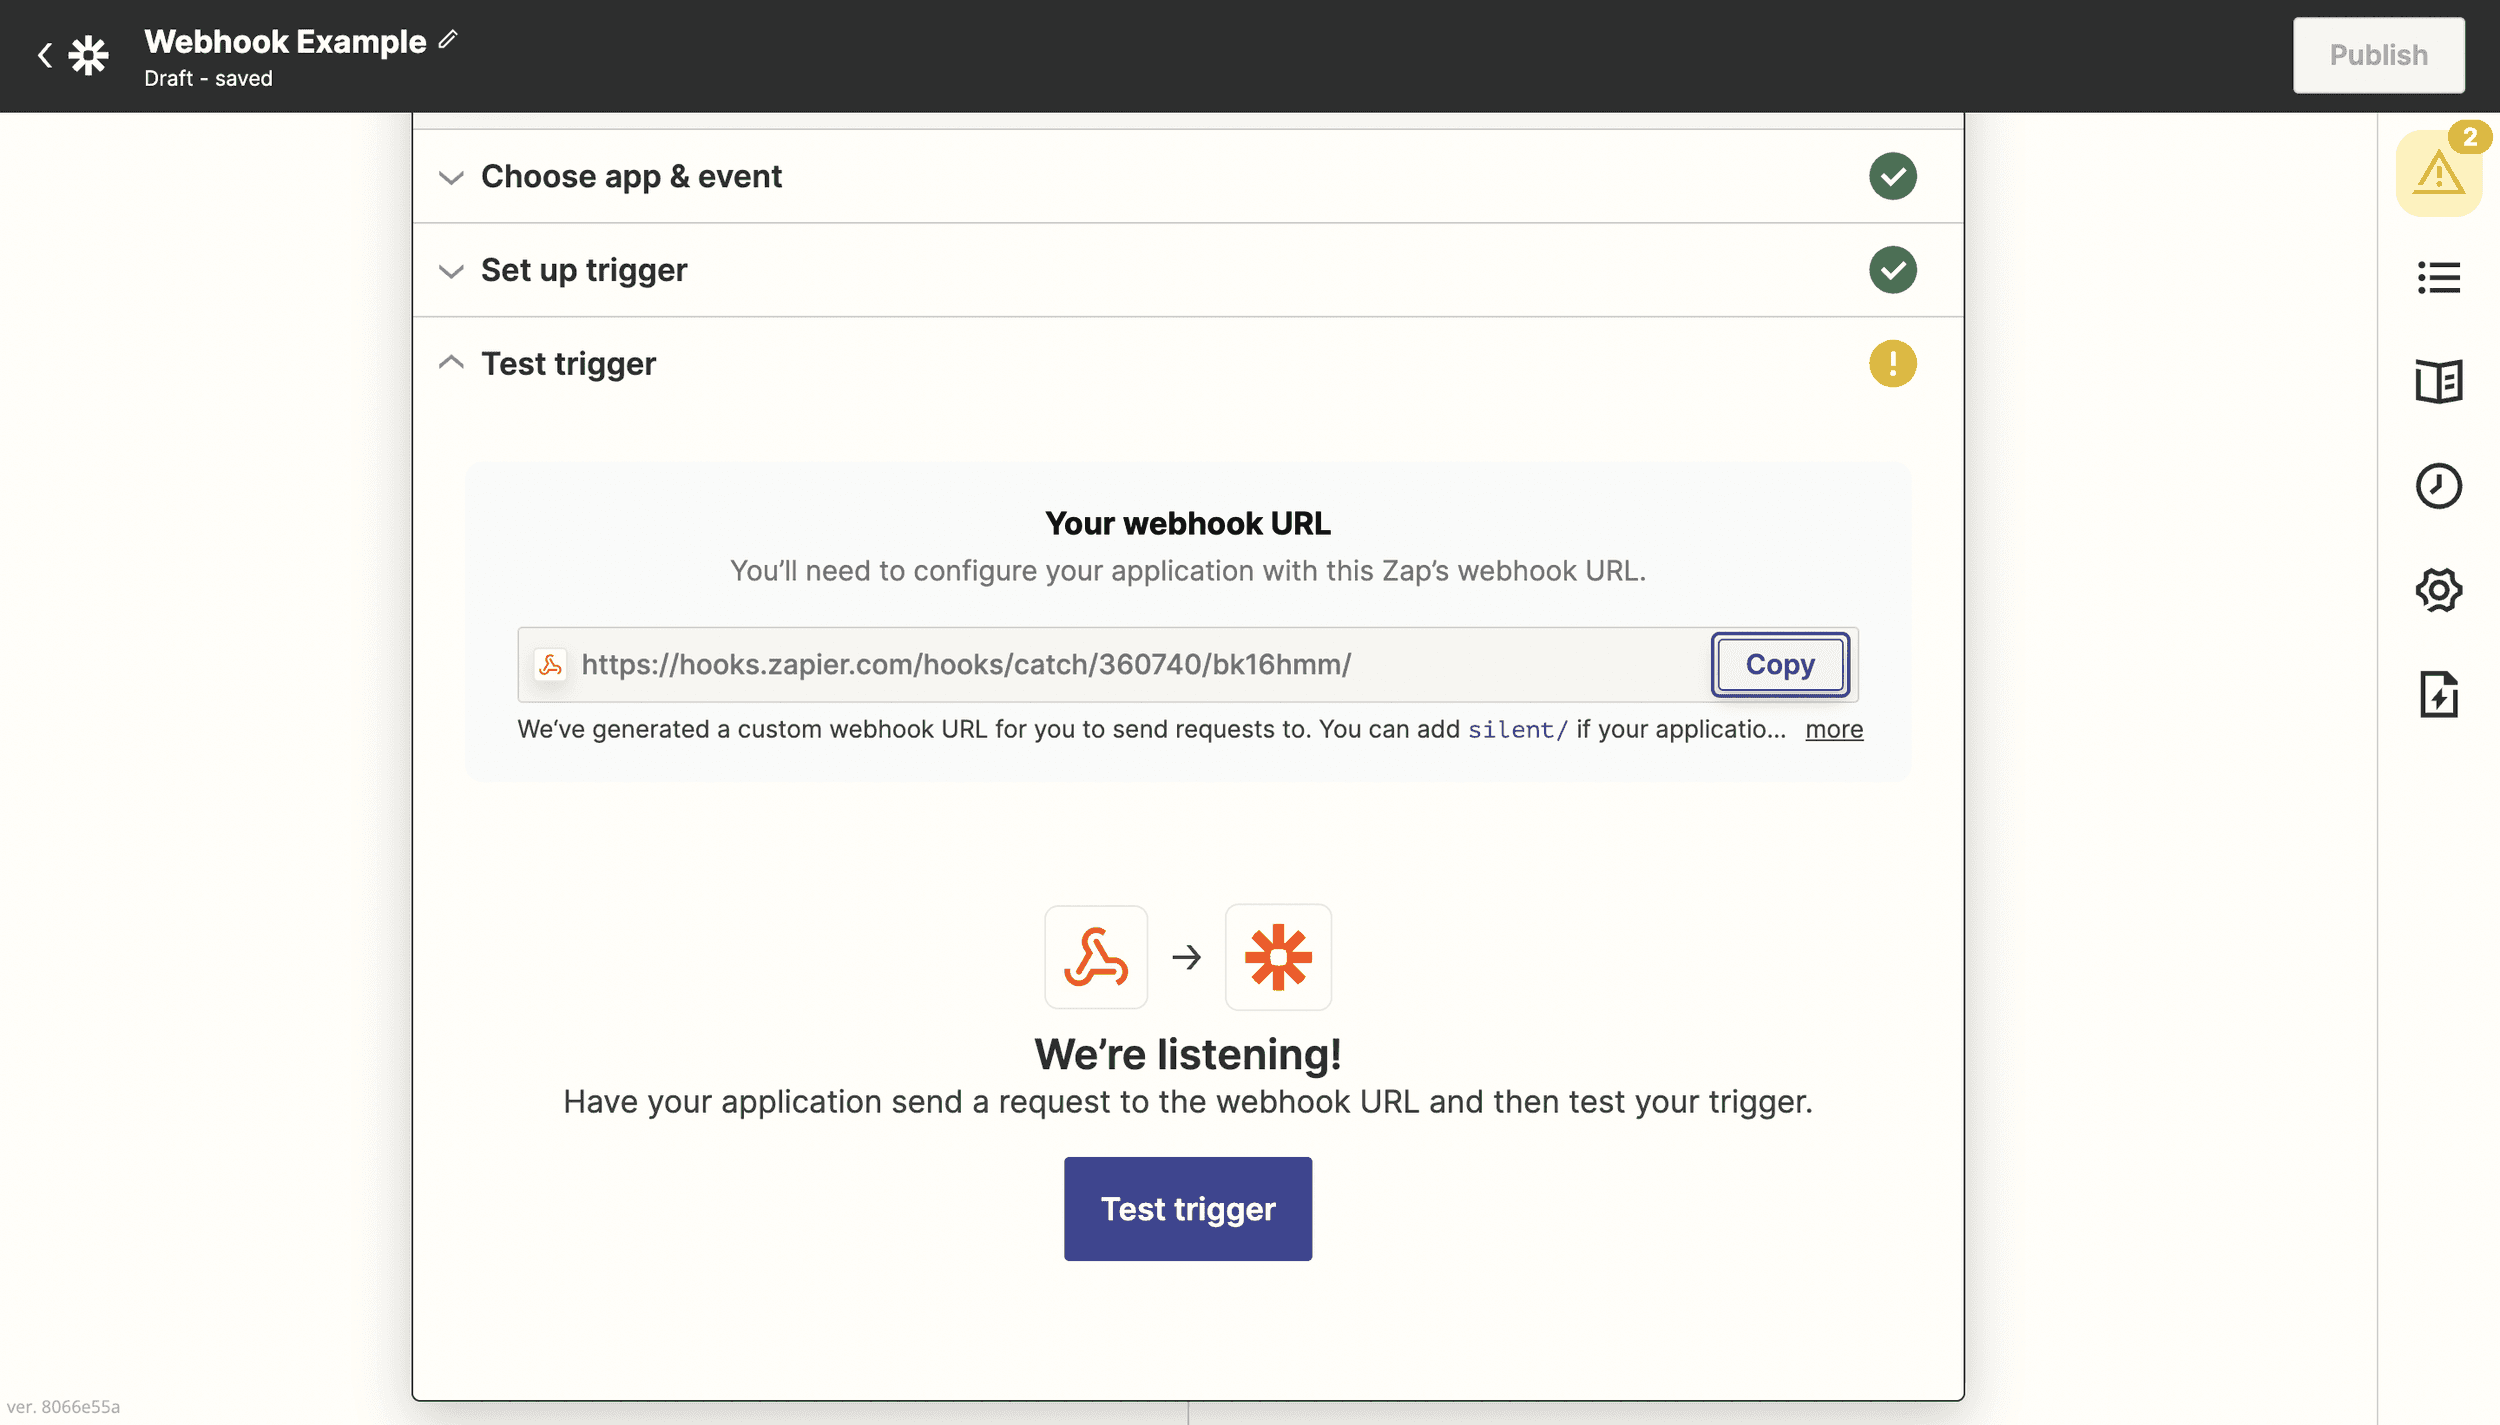
Step 3. Copy the URL that Zapier provides. It would be your unique link that will need to add to your OnSched account.
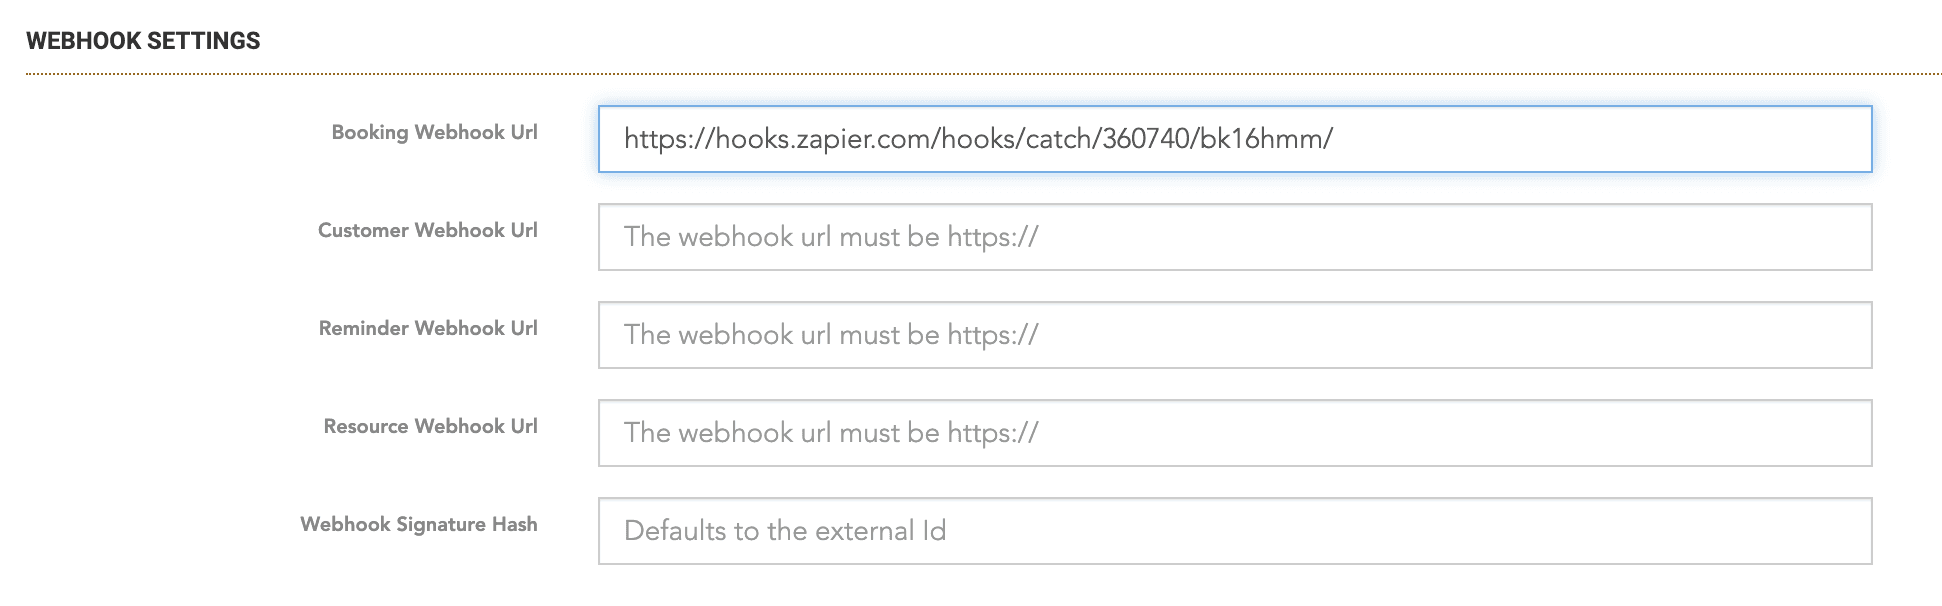
Step 4. Go to Company Profile > Company Settings > Webhook Settings and paste your unique Zapier link into the “Booking Webhook URL” field.
Step 5. Test the connection! Book a test appointment and verify that Zapier caught the webhook. The payload will contain data relevant to the event that triggered the webhook. In our case, it’s “BookingConfirmation.”

Step 6. Add actions to your Zap to connect it to the desired application - Gmail, Google Sheets, or Slack. You can pass data into any integration that Zapier supports.
Security
OnSched webhooks contain a signature so that you can verify us as the sender and prevent unauthorized activity. We use the SHA-256 signing algorithm to generate a signature based on a hash key that you configure or the default hash key, equivalent to the company's external ID.
How can webhooks help you?
Webhooks could be a great option if you want to automate a simple process like populating a spreadsheet with new bookings automatically or sending messages in Slack when a specific event occurs. It’s also a common practice to adopt webhooks for real-time data updates. For example, you can set up a URL for customer information updates instead of constantly fetching the database and comparing it with the existing data.
Conclusion
Webhooks are a simple and powerful tool. The fact that they are super popular means you can find tutorials on integrating them with any language and framework. Whether you are working on a complex scheduling scenario or a simple booking application, it is helpful to know what webhooks are and when you can use them, as it can save you enormous amounts of work.
How to get access to the OnSched API?
We love to guide our customers through the platform the first time they sign up. So: in order to gain free trial access to the OnSched API, book an intro call with our specialist. We promise it’s pressure-free 😉
Thoughtfully test the API for all of your user flows.
Request production server API keys when ready to go live.
If you have any questions about the OnSched API, we encourage you to book an intro call even if it’s not on your immediate roadmap - let's plan for the future!